Aspect Model Editor UI overview
This section gives a brief overview of the UI and its features.

1. Menu
File Menu
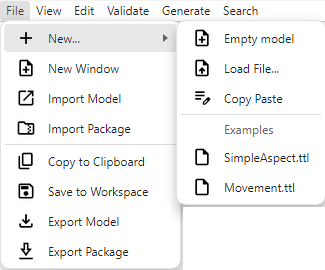
| Icon | Name | Action |
|---|---|---|
|
New… |
Opens a submenu to start a new model: * Empty Model (header only),
* Load File… – open a Each loaded model is opened in its own editor tab. |
|
New Window |
Work on a different Aspect Model in a new window. |
|
Import Model |
Bring an existing Model into the current workspace. |
|
Import Package |
Add a packaged Model (ZIP) to the workspace. |
|
Copy to Clipboard |
Copy the Turtle (RDF) serialization of the current Model to the system clipboard. |
|
Save to Workspace |
Store the current Model in the workspace for future use. |
|
Export Model |
Download the current Model as a TTL file. |
|
Export Package |
Download Model namespaces in a ZIP format. |


View Menu
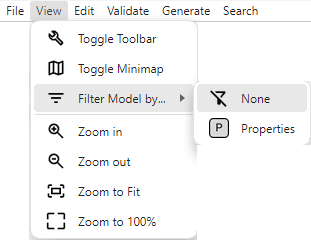
| Icon | Name | Action |
|---|---|---|
|
Toggle Toolbar |
Switch the Toolbar on or off to better tailor your workspace environment, allowing you to focus on the aspects of the model that matter most to you. |
|
Toggle Minimap |
Show or hide the Minimap to enhance or simplify navigation within your model, enabling you to quickly move to different sections of your work. |
|
Filter Model by… |
Apply filters to the model based on none, Properties, or other criteria, simplifying your view to concentrate on specific elements or relationships. |
|
Zoom in |
Increase the level of detail you see in the model, allowing for closer examination of intricate parts or to fine-tune specific areas. |
|
Zoom out |
Broaden your view of the model to gain a better understanding of the overall structure and how individual components fit together. |
|
Zoom to Fit |
Adjust your perspective to encompass the entire model within your screen, ensuring you have a comprehensive overview of all elements at once. |
|
Zoom to 100% |
Reset your viewpoint to the model’s actual size, offering a standard scale for assessing dimensions and spatial relationships accurately. |


Edit Menu
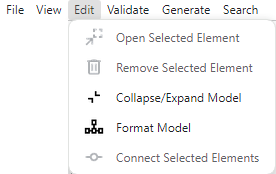
| Icon | Name | Action |
|---|---|---|
|
Open Selected Element |
Launch the Edit dialog for the selected element, providing a direct path to modify its attributes or review its details. |
|
Remove Selected Element |
Delete the currently selected element from your model, streamlining your workspace by removing unnecessary or redundant components. |
|
Collapse/Expand Model |
Toggle the view of your model between collapsed and expanded states, aiding in focusing on specific sections or understanding the model’s overall structure. |
|
Format Model |
Automatically adjust the layout and appearance of your model, enhancing readability and maintaining consistent styling throughout. |
|
Connect Selected Elements |
Create a linkage between two selected elements, establishing a relationship or flow that reflects their interaction within the model. |


In addition, the Edit menu contains the standard text editing commands (Undo, Redo, Cut, Copy, Paste, Select All). These only apply to text input fields (e.g., in the Edit dialog). To undo and redo changes of the graph, use the Undo and Redo buttons of the toolbar or the keyboard shortcuts, see Undo and redo.
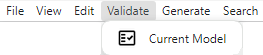

Generate Menu
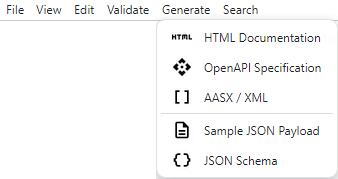
| Icon | Name | Action |
|---|---|---|
|
HTML Documentation |
Generate HTML documentation. |
|
OpenApi Specification |
Generate OpenAPI specification. |
|
AsyncAPI Specification |
Generate AsyncAPI specification. |
|
AASX/XML |
Generate AASX/XML. |
|
Sample JSON Payload |
Generate sample JSON payload. |
|
JSON Schema |
Generate json schema. |




2. Toolbar
| Icon | Name | Action |
|---|---|---|
|
Edit highlighted cell |
Open the Edit dialog of the selected element (alternative: double-click an element inside the model). |
|
Delete |
Delete selected element(s). |
|
Connect |
Connect two selected elements. |
|
Collapse all/Expand all |
Expands/Collapses elements. |
|
Format |
Automatically format the Aspect Model. |
|
Validate |
Validate the Aspect Model. |
|
Zoom in |
Zoom in the Aspect Model. |
|
Zoom out |
Zoom out the Aspect Model. |
Prefixes |
Open the prefix management of the current model, see Prefixes. |

Prefixes
A prefix is only a short notation for a namespace (e.g. samm: or :).
Renaming a prefix changes how IRIs are written in the file, the IRIs themselves stay the same.
The Prefixes dialog lists all prefixes of the current model with their namespace and whether they are Used or Not used. You can:
-
Add prefix: declares a prefix for a namespace. Declared prefixes are written to the file even if no element uses them yet.
-
Rename prefix: changes the short notation everywhere in the model.
-
Remove prefix: only possible for prefixes which are not used by elements of the model.
Prefixes of the model itself and of the SAMM/RDF vocabularies are protected and cannot be changed.
When you add an element of another namespace (e.g. by drag and drop from the Workspace sidebar) and the model has no prefix for that namespace yet, the dialog Prefix for referenced namespace asks which prefix to use. It suggests the prefix of the referenced file; with Use automatic prefix the editor chooses one.
The dialog is also available in the text view (Manage prefixes).
Element search
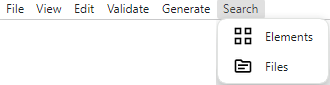
Use Search > Elements (Cmd/Ctrl+F) in the graph view to open the element search field Search elements….
The search finds elements by their name, preferredName and description, including all languages in the model.
It also finds words inside camelCase names, ignores accents and umlauts, and shows approximate matches when there is no exact match.
Selecting a result opens that element in the Edit dialog.
In the text view, Cmd/Ctrl+F opens the text search inside the Turtle text instead.
|
Resize panels
Several side panels have a vertical resize handle with a more_vert icon. Drag the handle to change the width, use the left and right arrow keys while the handle is focused, or double-click the handle to reset the width.
The widths are remembered on this device for the Workspace sidebar, the Workspace element list, the SAMM elements sidebar and the Edit dialog. Panels still keep their minimum and maximum widths and are clamped to the available screen size.
3. Workspace sidebar
The Workspace sidebar – see screenshot below – allows you to access namespaces (2) and to drag and drop elements to the graph area canvas (1).
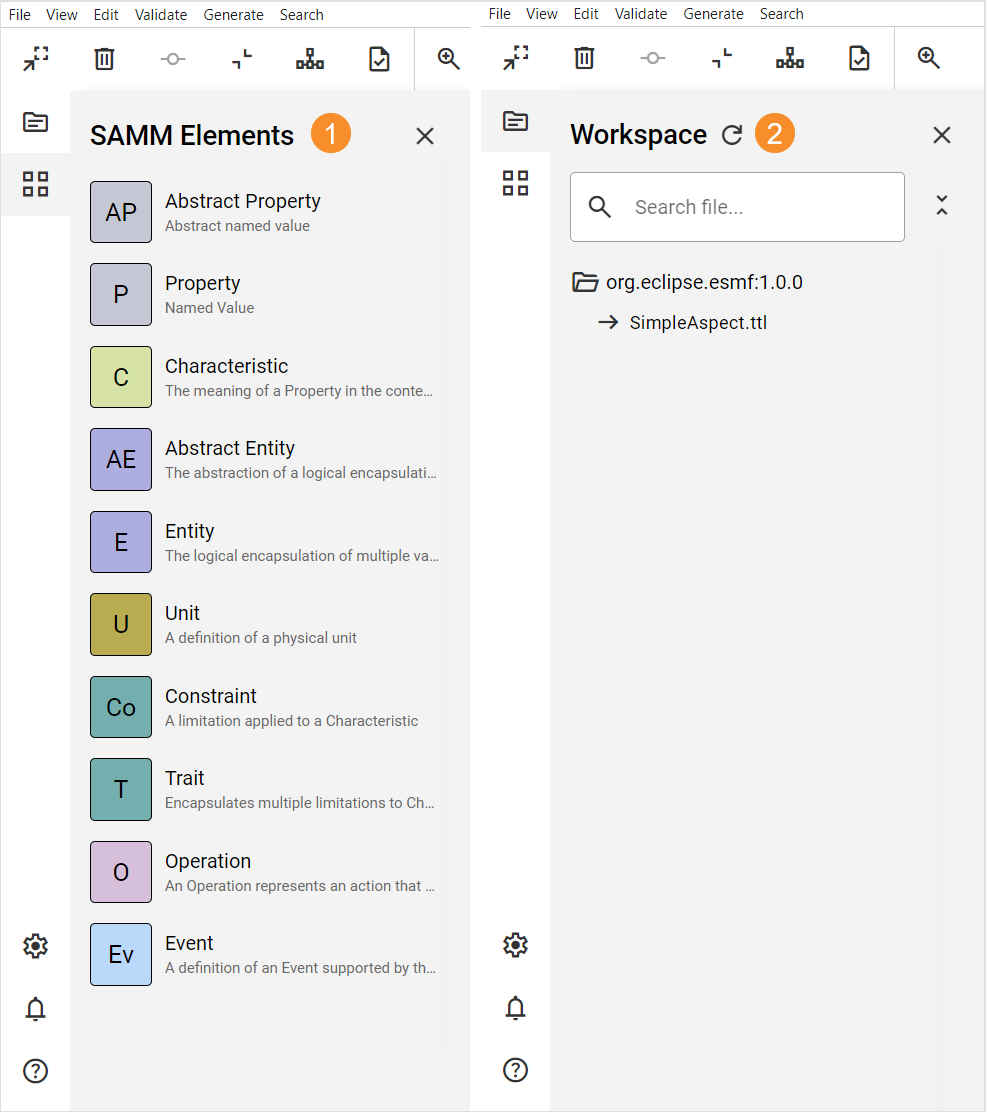
Expand the Workspace sidebar to view the description of each element.
To add an element to your model drag and drop it on the graph area canvas, edit its details, and connect it with the rest of the graph.
For more information, see Edit models.
Bottom workspace sidebar
| Icon | Name | Action |
|---|---|---|
|
Open settings. Allows for defining the general configuration of the Aspect Model Editor, language settings, and namespace settings. To access the Settings dialog, click the Settings icon For more information, see Settings. |
|
|
Open notifications. Shows the validation results for your Aspect Model. Further, you can find there info messages (e.g., Aspect Model was loaded) and warning messages (e.g., if elements cannot be connected to each other). To access the Notifications dialog, click the Notifications icon For more information, see Validation and notifications. |
|
|
Help |
Open help dialog. It displays details about the application and provides a link to the documentation. |


4. Graph area canvas
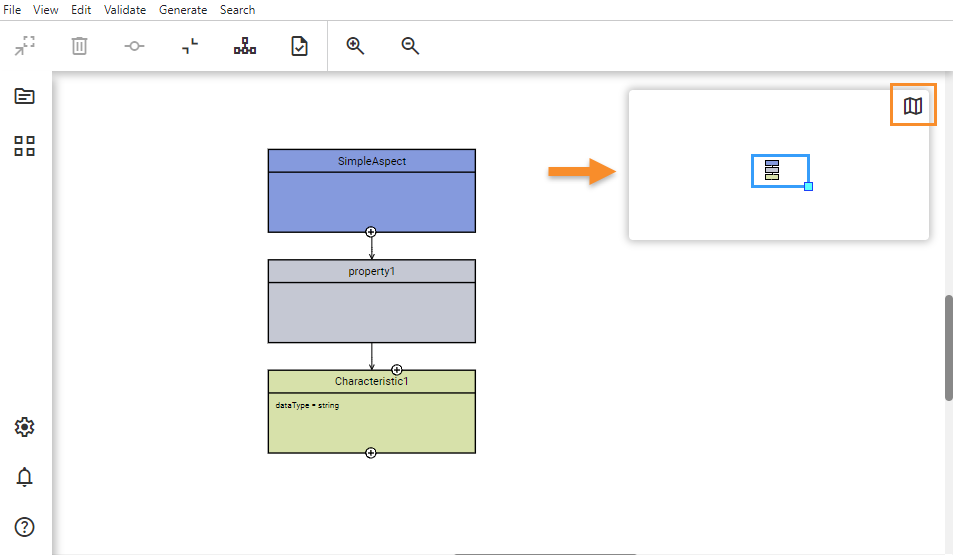
This is the space where your Aspect Model is visualized. You can easily navigate it in the graph area canvas using the Minimap.
To show or hide it, click the Toggle Minimap icon  in the upper right corner of the graph area canvas.
Alternatively, you can also use the Toggle Minimap option in the View Menu.
For more information, see Navigate models.
5. Edit dialog
Edit the attributes of a selected element of your Aspect Model with the Edit dialog.
How to access the details of an element in the Edit dialog:
-
Double-click the element.
-
Select the element and right-click to open the context menu. Then select Open in detail view
 .
-
Select the element and click the Edit highlighted cell button
on the toolbar.
At the bottom of the Edit dialog, the lists Incoming edges and Outgoing edges show all elements that are connected to the edited element. Use the buttons of an entry to locate the element in the graph area canvas, open it in the Edit dialog, or – for elements from another file – open it in a new tab. These lists, as well as the connection-related fields (e.g., the data type of a Characteristic), are updated immediately when you add or remove connections in the graph area canvas while the Edit dialog is open.
For more information, see Edit elements.
6. Editor tabs
The Aspect Model Editor can keep several models open at the same time. Each opened model is shown as a tab in the tab bar above the graph area canvas.
-
The tab shows the file name of the model. Hover over a tab to see its namespace and file name.
-
A dot next to the file name indicates that the model has unsaved changes.
-
Click a tab to switch to that model. The open Edit dialog of a tab is restored as well.
-
Click the + button to open a new tab with an empty model (
new-model.ttl,new-model-2.ttl, …). -
Click the x button of a tab to close it. If the model has unsaved changes, you are asked whether you want to save them first. When you close the last tab, a new empty model is opened.
-
Opening a model that is already open (e.g., from the Workspace sidebar) switches to its existing tab instead of opening it twice.
-
Loading a model while an untouched empty model tab is active replaces that empty tab.
-
If there are more tabs than fit into the tab bar, use the arrow buttons or the mouse wheel to scroll through them.
-
Use the switch Edit / Aspect Model at the right end of the tab bar to change between the graphical editor and the read-only Turtle text of the model, see Aspect Model text view. The view is remembered per tab.
-
In the desktop app the open tabs and windows can be restored on the next start, see Restore the last session.
7. Keyboard shortcuts
On macOS use Cmd, on Windows and Linux use Ctrl. Shortcuts of menu entries that are currently disabled (e.g. without a loaded model) have no effect.
| Shortcut | Action |
|---|---|
|
File > New… > Empty Model |
|
File > New… > Load File… |
|
File > New… > Copy Paste |
|
File > New… > SimpleAspect.ttl |
|
File > New… > Movement.ttl |
|
File > New Window |
|
File > Import Model |
|
File > Import Package |
|
File > Copy to Clipboard |
|
File > Save to Workspace |
|
File > Export Model |
|
File > Export Package |
|
Settings (macOS: application menu, Windows/Linux: File menu) |
|
View > Toggle Toolbar |
|
View > Toggle Minimap |
|
View > Filter Model by > None |
|
View > Filter Model by > Properties |
|
View > Zoom in |
|
View > Zoom out |
|
View > Zoom to Fit |
|
View > Zoom to 100% |
|
Edit > Open selected element |
|
Edit > Remove selected element |
|
Edit > Collapse/Expand Model |
|
Edit > Format Model |
|
Edit > Connect selected elements |
|
Validate > Current Model |
|
Generate > HTML Documentation |
|
Generate > OpenAPI Specification |
|
Generate > AsyncAPI Specification |
|
Generate > AASX / XML |
|
Generate > Sample JSON Payload |
|
Generate > JSON Schema |
|
Search > Elements (in the text view: search in the text) |
|
Search > Files |
|
Delete the selected element(s) in the graph area canvas |